
This post may contain affiliate links. If you use them, it helps keep the blog going, which I appreciate.
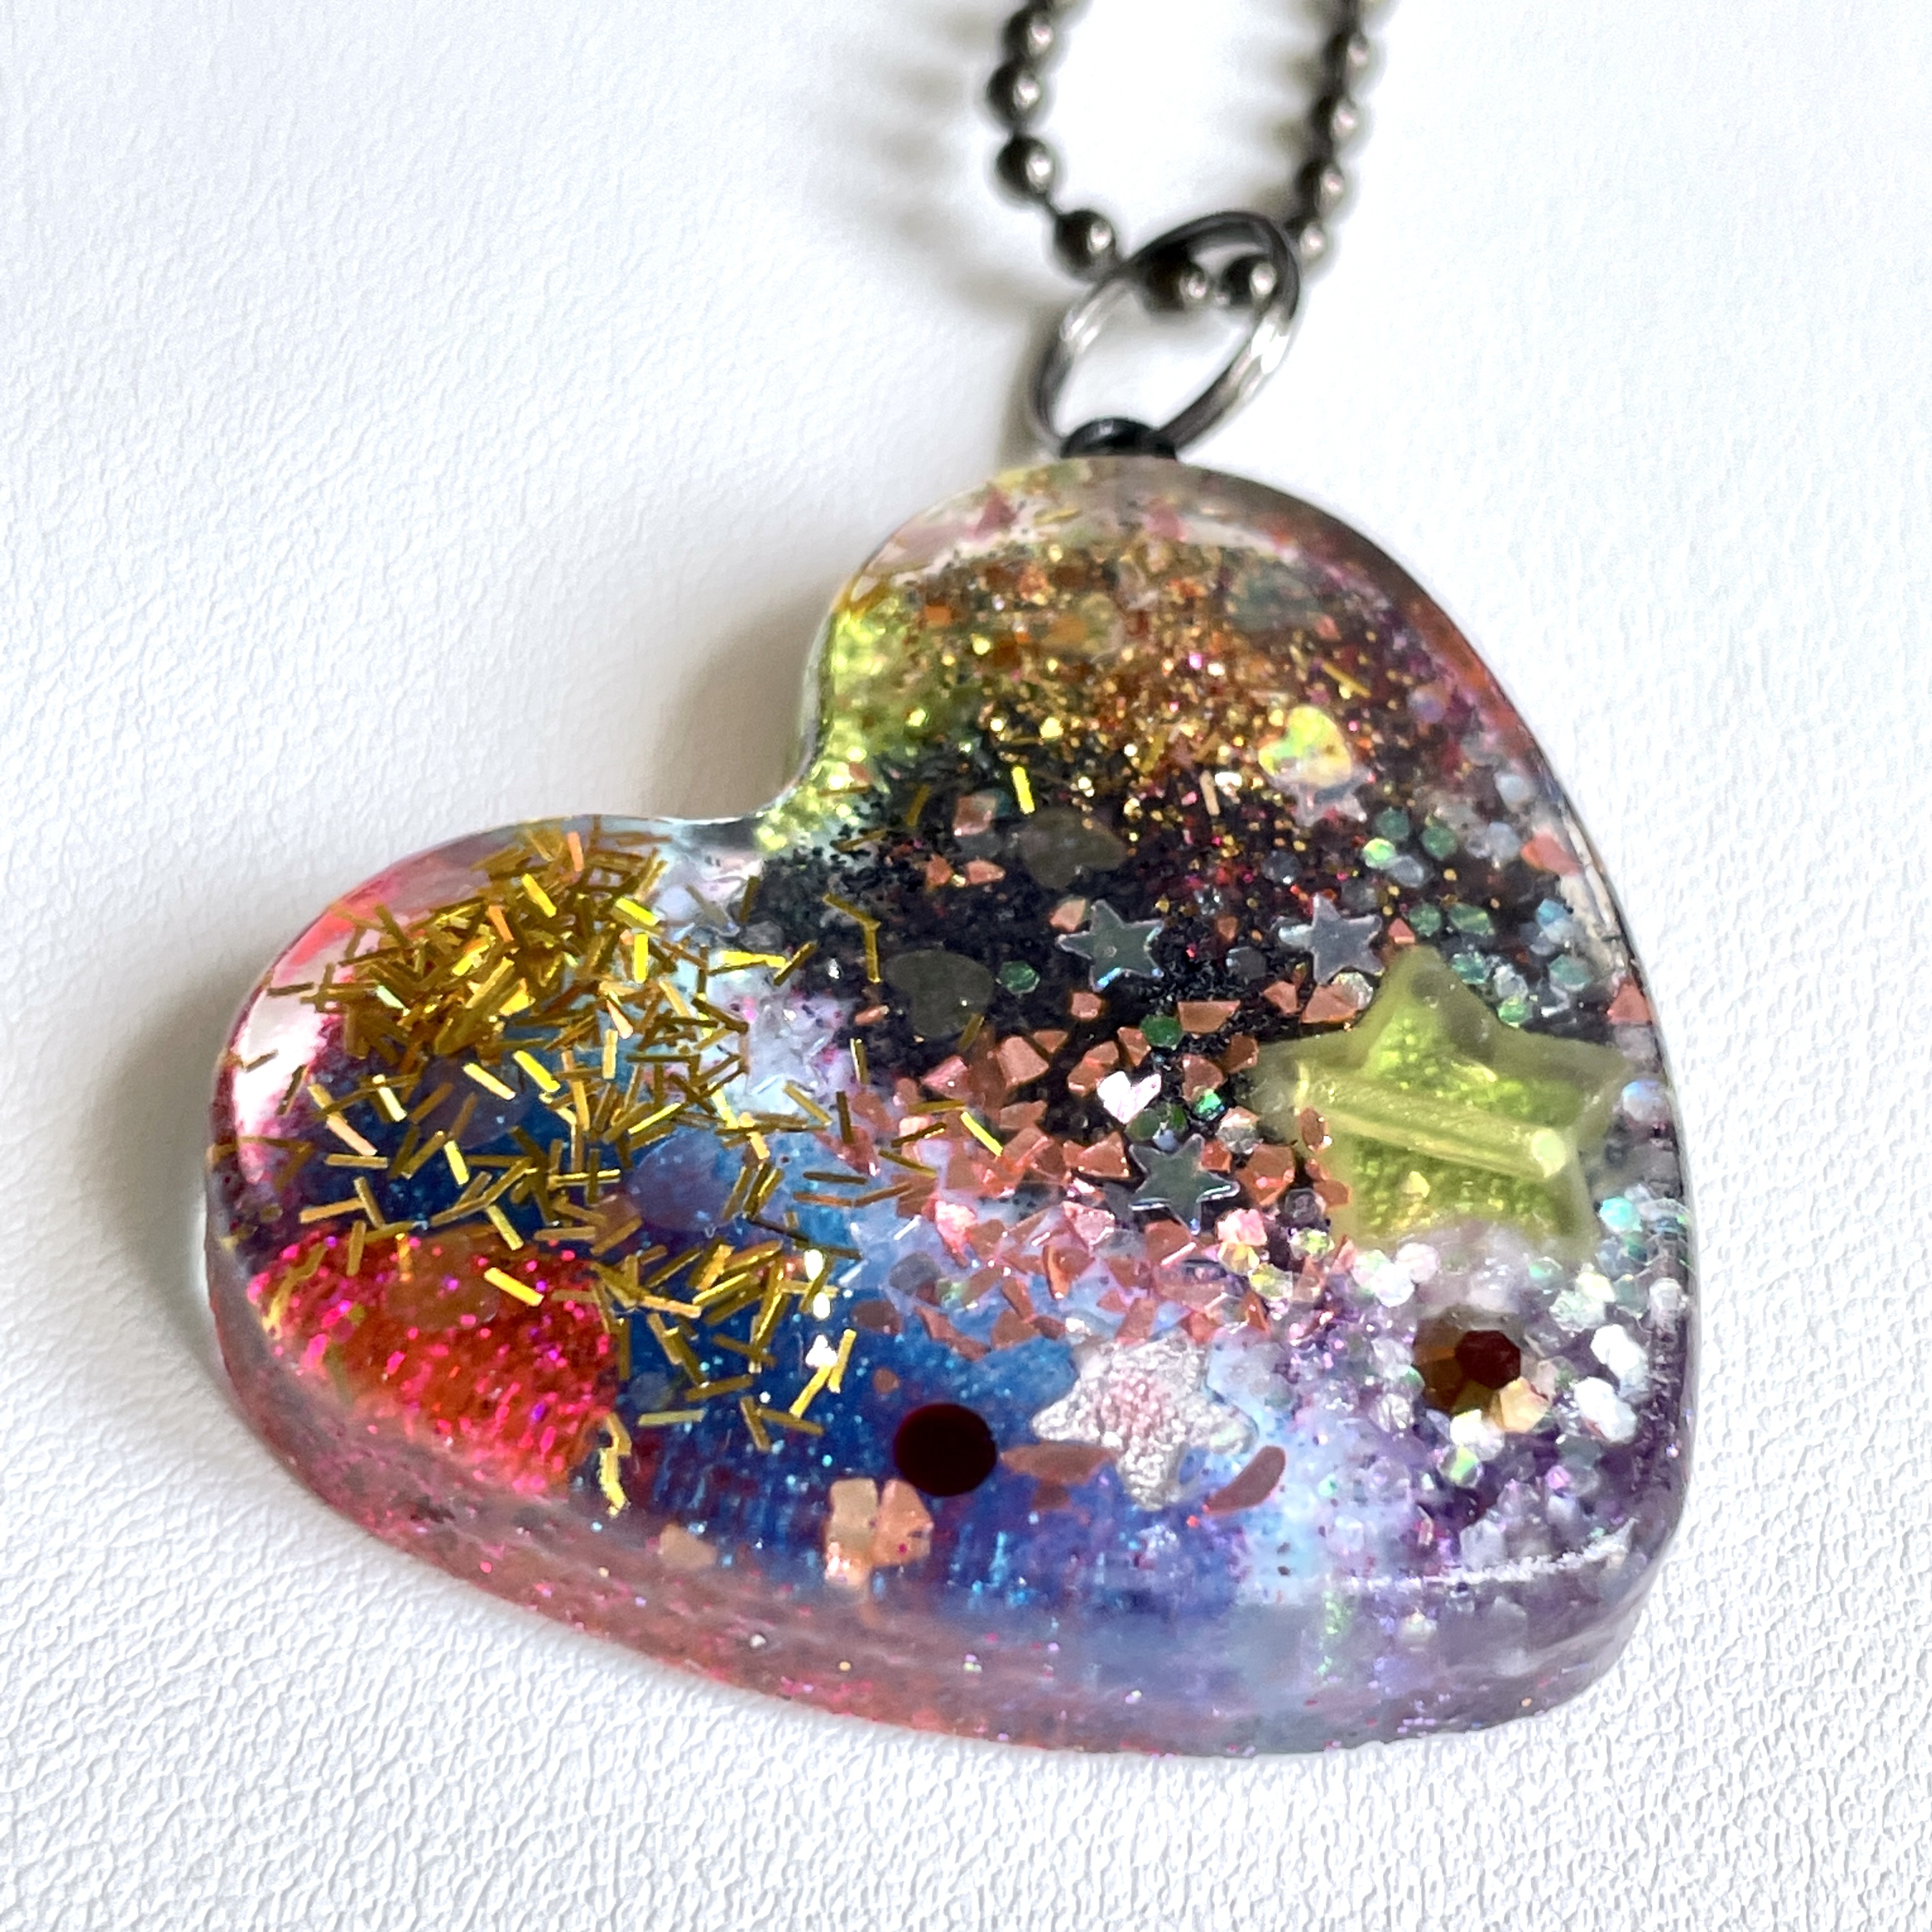
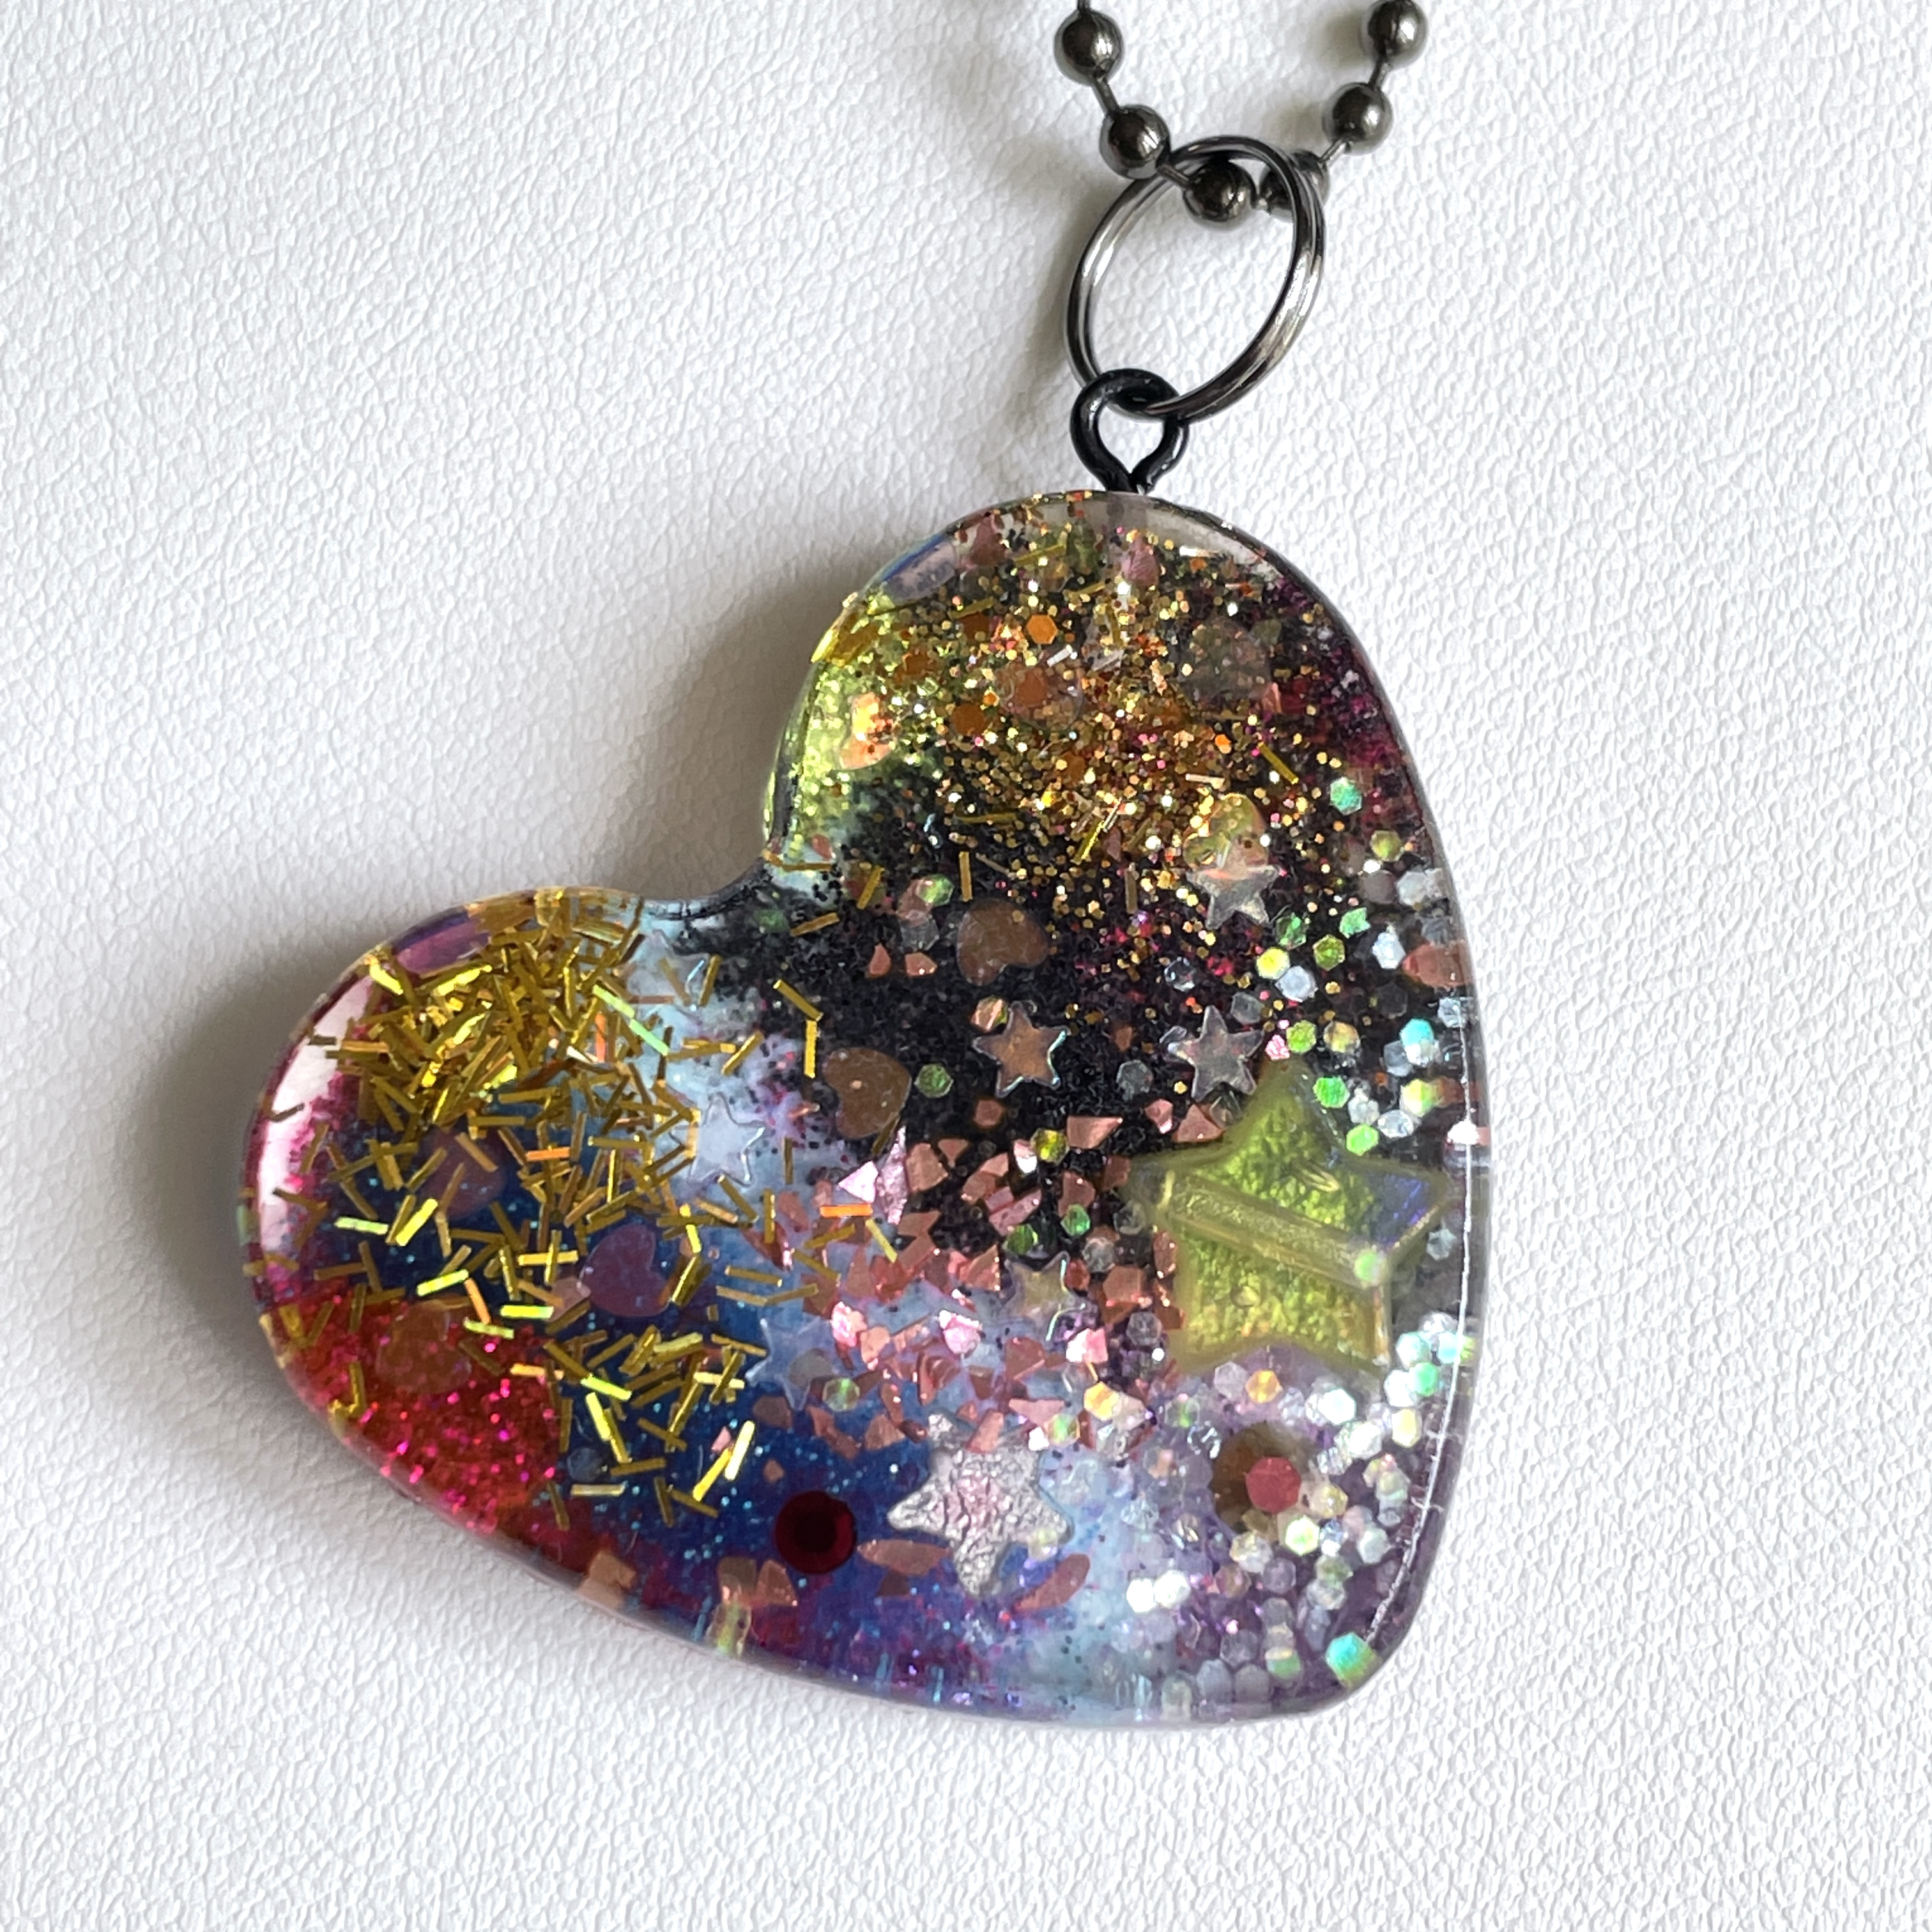
The OG hearts started as me testing what I liked seeing suspended in resin, not as a collection. As someone who loves cute, I’ve accumulated a lot of small things I’d tell myself, “I’ll use this someday.” This was that moment.
I didn’t have much money at the time, but I managed to get some resin. I had never poured before, but I was set on learning so I could utilize the things I’d been holding onto.
I call these OG Hearts because it was the first mold I worked from. It was silicone and not shiny, so I already knew anything I made would need finishing. I started by mixing resin and filling molds with leftover glitter just to see how it behaved. What sank, what floated, how fast it started to cure. I kept mental notes as I went.
Eventually I was ready to “design” a pour. I knew what I wanted to see, but I had to think in reverse. The plan was to build it in layers. Here’s what I did with this first OG Heart.
Supplies
Your choice of resin.
A silicone mold. Make sure the cavity is deep enough, closer to ice cube tray depth
Cute components. I used glitter, rhinestones, and beads. Cabochons work too
A silicone mat or placemat you don’t care about. You will drip
A heat gun to pop bubbles
Craft sticks or silicone tools. I use both depending on how I feel
Things to Keep in Mind
Two-part resin can be fussy. Most call for a 1:1 ratio. Even if you’re good at mixing, your layers should stay thin.
Depending on your mold size, it’s easier to accept that you’ll be working on multiple pieces at once. Resin doesn’t always wait for you, and there can be a lot of waste if you don’t use what you mix.
Layer 1
This first layer becomes the front of the piece. I pour a very thin layer. I usually do a few hearts at once.
Make sure your workspace is clean. No lint, no fuzz. This layer is the clear window into everything you’re about to build.
Use the heat gun to remove bubbles and let it cure.
Layer 2
This layer holds your largest components. It’s the fun in the foreground.
I spread a little resin on the front of each piece, then place it onto the cured first layer, face down. This helps avoid air bubbles. After that, I pour another thin layer of resin. It may not fully cover everything, which is fine.
Blast the heat gun and let it cure.
I should have placed the star bead here, but this was my first one. I did what I could.
Layer 3
This layer is for medium-sized components.
I should have placed the larger glitter flakes here, but it’s fine. There’s a reason I put them where I did, even if it wasn’t intentional at the time.
You can sprinkle glitter directly where you want it. Pour another thin layer, use the heat gun, and set it and forget it!
Layer 4
This is where I build the background.
I use a heavier amount of glitter here. When pouring this final layer, I go slowly. Pour too fast and you’ll shift everything underneath.
Nothing wrong with taking your time. Zap it with the heat gun and let it sit overnight.
Demolding
This is one of the most satisfying parts.
Make sure your hands are clean and pop the piece out. If your mold is shiny, you’ll already have a clear finish. If not, like mine, there’s one more step.
The Front
This is the part that makes me the most nervous.
Everything can go right, and then this step can still ruin it.
I usually choose between doming or using a clear coat.
Doming
I mix a small amount of resin and use a craft stick to apply it to the surface.
I start by getting a little resin on my craft stick and outlining the edge, then drip resin into the center and let it spread outward. It relies on surface tension to level itself.
It’s easy to add too much and have it spill over. I’ve done it. It’s painful.
Use the heat gun for bubbles, but start farther away than usual. You don’t want to blast the resin off the surface.
Clear Coat
This is the easier option.
Use a spray clear coat in a well-ventilated space. Make sure the temperature is right so it dries properly.
Start spraying off to the side and glide across the piece to avoid sputtering.
Let it dry fully. Don’t rush it. I’ve ruined pieces by touching them too soon. It happens.
Also, it smells. If you’re doing this, batch your pieces so you only deal with it once.
Finishing Touches
You may need to sand rough edges depending on your mold.
I use a Dremel and add a bit of resin to bring back the shine.
Conclusion
This piece wasn’t planned as a collection. It was me figuring out how resin behaves and what I like enough to repeat.
Looking back, the “design process” wasn’t something I had before I started. It was something I built by paying attention to what worked, what didn’t, and what felt worth doing again.
I still think about design this way. Not as something fixed before I start, but as a series of decisions I make while the piece is already happening.
