
Affiliate links are included in this post. I may earn a small commission if you purchase through them, at no extra cost to you.
So, like every crafter out there, you probably have been through a lot of trial and error. Hopefully this post helps you save some time and money when it comes to your favorite adhesives for deco. I’ll start from the beginning of my usage. These are my opinions and I am no way an adhesive authority. Here we go!
Super Glue for Decoden (What Happened When I Tried It)
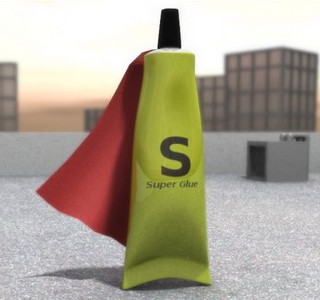
When I did my first deco, I used super glue. This was out of convenience. It was in my house and payday was 4 days away so I said, what’s the worst that could happen?
I found working with this glue was tricky. It’s clear and liquidy. I found myself getting my fingers stuck together and gluing my work to my work surface. I found myself working rather quickly, but not too quickly as this glue is like water. Superglue has a distinct smell so I did crack a window.
As for the finished project, the cabs held on well, but not all. If I were to drop the case certain cabs were surely to pop and crack off. Needless to say, when I got paid, I purchased another type of adhesive. I only have it in my house for emergencies. It’s not what I would pack in my dream deco kit.
Resin Epoxy for Decoden (Strong but Fast)
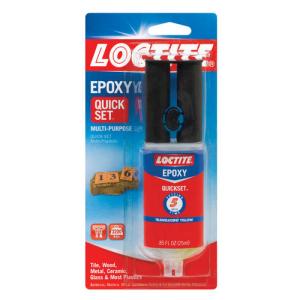
I hopped online and contacted one of my favorite deco suppliers and asked her what she was using in her latest projects. She recommended that I check out the hardware store and try some resin epoxy. Essentially, you have two tubes, one filled with a catalyst and the other filled with the epoxy. You push down on the plunger thing (I’m so technical) and equal amounts of each substance come splooging out separately. To activate the epoxy, I used a toothpick to mix the contents. I used an index card and spread out several dollops of each and mixed when I was ready to roll. (Think candy dots. the dollops were smaller than a dime). Most of these epoxies give you a 4-7 minute window to work. I found myself working even faster than I was with the super glue. I worked carefully because I had no idea how this stuff would bond to my skin or work surface. I didn’t want to chance it.
This stuff really holds well. The projects that I have produced with this epoxy still remain in tact. (at least the ones I own) When the epoxy dries, I’d say it’s not stiff. It has some bounce which probably helps absorb shock.
The downsides to the two-part epoxy are the smell, “evenness” and the waste.
- Smell: I had to open the window and use a tiny fan I used to dry my nails to circulate the air in my work space.
- “Evenness”: When I syringed the contents out of the tubes, I noticed that the contents of one tube were more dense than the other. As I got to the end of the epoxy, my dollops weren’t as even. This was a bit concerning because the ratios have to be even for the epoxy to cure properly. I’ve never had a curing issue, but I quickly became aware of the possibility.
- Waste: Since the window to work once the glue is activated is only 4-7 minutes, my index card always had hardened epoxy all over. Maybe I’m a slow working Suzanne, but I had a hard time utilizing all the epoxy. It made me a little sad. lol.
Overall, this is a great adhesive for the price, longevity and wear. If you have hand injuries or arthritis, the syringe applicator may be tiring.
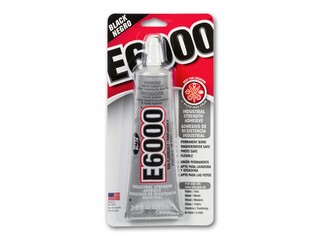
E6000 for Decoden (My Go-To Adhesive)
After working with the resin epoxy for a few months, I wanted to find an alternative so I didn’t need to work so fast. Let’s face it, some of our creative moments stem from those pauses to think, respond to a text or finish lip syncing to that one song by RuPaul.
I used to work retail part-time at a clothing store and I bought these ridiculously cute jeans. They had tiny rhinestones on the back pocket and after one wash a few were gone. My manager suggested E6000 and gave me some rhinestones that matched close enough. I know you all are thinking, “Damn, this lady is late to the game,” but hey, life is all about learning!
The first thing I ever deco-ed with E6000 was a sunglass case. Poly/plastic type texture. It was a very good experience. You only need a little E6000 to place a cab for life. The glue itself is a bit more dense than Elmer’s All Purpose Glue. The first tube I purchased was clear but now I also keep a tube of white on hand. (I’ll explain why later.) I would very VERY, gently squeeze the tube and apply the glue either directly to the cab or onto a toothpick and then to the cab. This is the adhesive I always have on hand for my projects. I don’t ventilate my work area when I use this glue, but when enough of us are working, it’s best to crack a window
The downsides to E6000 are the tube it comes in, the strings it creates and time to place & settle.
- Tube: The tube is metal like, so once you squish or crimp it, there is no turning back. When you extract the glue, sometimes it seems like so much is coming out of that little hole and sometimes it never stops. I recommend using light pressure. Also, as I go through the tube, I find myself rolling it to get every last bit. This can back fire. I have had situations where the bending and rolling lead to the bottom half of the tube cracking, thus resulting in more E6K on my hand rather than my cabs.
- String Theory: This glue likes to trail. I’ll be applying theE6K to a cab, I’ll pull back on the tip, and boom: spider web thread. I don’t know how to prevent this, but I just swat at them like a crazy woman.
- Enter: White E6K – I got a tube of this on accident because it was on sale. It was a happy accident. This dries white, so I have to be selective with which components I glue with. The white variety is not as stringy compared to its counterpart.
- Time to Place & Settle: This glue does not dry instantly. I have placed cabs and had them slide on me. To avoid this, I’ll blow on the glue a but to let it get a little tacky, then place it.
This is a glue that I see most decoden creators using. It holds really well and a little goes a long way.
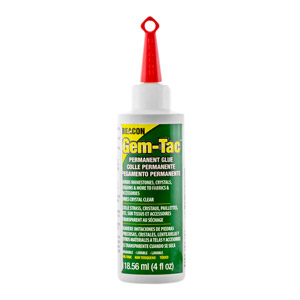
Gem-Tac for Rhinestones and Light Work
I used to work as a Ballet instructor at a dance studio. Before recital and competition time, it’s all about rhinestones. On my breaks, I was asked to help with this process.
The moms were using E6K or Gem-Tac. At first I was using the E6K because that’s what I was used to. Then. I couldn’t find a tube so I used the Gem-Tac that was on the desk. (Lazy Lanna over here.)
Once the cap is unscrewed, I used scissors to snip the top of the tube to allow the glue to flow. It looks exactly like Elmer’s school glue and has remotely no odor. Gem-Tac allows some time for placement and dries clear.
The downsides I have experienced are loss of adhesion when soaked and larger cabs falling off.
- Water Contact: If an item gets in prolonged contact with water, it compromises its hold. I’ve had cabs fall off of my phone case from a water spill after clean up.
- Larger Cabochons: big heavy cabs can “peel” off.
I do keep this on my craft supply list because its easy to see and use with tiny rhinestones.
As long-winded as this post was, I hope it helps and saves you time & money.
